We will explore how to migrate between two Core Data model versions and delete one entity’s objects. We’ll do this using a mapping model and a custom migration policy.
You can find the complete example project in GitHub: DeleteEntitiesCoreDataMigration.
Model Versions
We’ll be working with a Core Data model that has two entities, Post and Comment.
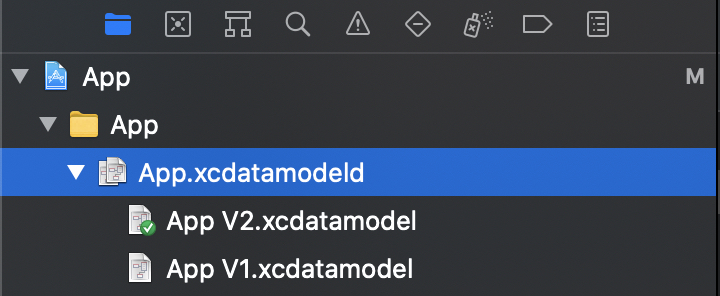
Both entities are defined in two model versions, App V1 and App V2.

And to make things simple, there are no structural changes between the model versions.
Goal
Our goal is to delete the Post objects when migrating from App V1 to App V2. After the migration, the Comment objects should be left intact.
Step 1: Create a Mapping Model
We will need a mapping model to customize the migration from App V1 to App V2. Create a new file using the menu File → New → File. Choose Mapping Model.

On the next dialogs that will come up, choose App V1.xcdatamodel as the Source Data Model. Choose App V2.xcdatamodel as the Target Data Model. Save the mapping using any file name. I suggest something descriptive like MappingV1toV2.xcmappingmodel.
The result should look like this:

Step 2: Create a Migration Policy
The mapping model does not do anything special as it is right now. To instruct Core Data to delete the Post objects, we will specify a migration policy for the PostToPost entity mapping. Create a new Swift file named DeleteObjectsMigrationPolicy.swift. And the contents will be:
import CoreData

final class DeleteObjectsMigrationPolicy: NSEntityMigrationPolicy {
    override func createDestinationInstances(forSource sInstance: NSManagedObject,
                                             in mapping: NSEntityMapping,
                                             manager: NSMigrationManager) throws {
        // Empty so that the object will not be migrated over.
    }
}
This simple policy is all that we need. Leaving the createDestinationInstances override empty will instruct Core Data not to retain the NSManagedObject after the migration.
Step 3: Attach the Migration Policy to the PostToPost Entity Mapping
Next, we will need to set the Custom Policy to App.DeleteObjectsMigrationPolicy for the entity whose objects we want to delete during the migration. The “App.” is the package name of our example project. It will be different for you.
Since we want to delete Post objects, we’ll modify the PostToPost entity mapping’s Custom Policy.

Step 4: Manually Migrate
Using custom mapping models is not handled automatically by Core Data. So, we would need to create our own migrate() function like the following.
/// Migrates the store located at `storeURL`.
///
/// - Parameter storeURL: The URL of the Core Data store that will be migrated.
/// - Parameter from: The current model version of `storeURL`.
/// - Parameter to: The model version to migrate to.
func migrate(storeURL: URL,
             from sourceModel: NSManagedObjectModel,
             to destinationModel: NSManagedObjectModel) throws {
    // Create a temporary store URL. This is where the migrated data
    // using the model will be located.
    let tempMigratedStoreURL = makeTemporaryStoreURL()

    // Retrieve the custom mapping model that we defined.
    let mappingModel = NSMappingModel(from: [mainBundle],
                                      forSourceModel: sourceModel,
                                      destinationModel: destinationModel)!

    let migrationManager = NSMigrationManager(sourceModel: sourceModel,
                                              destinationModel: destinationModel)
    // Migrate the `sourceStoreURL` to `tempMigratedStoreURL`.
    try migrationManager.migrateStore(from: storeURL,
                                      sourceType: storeType,
                                      options: nil,
                                      with: mappingModel,
                                      toDestinationURL: tempMigratedStoreURL,
                                      destinationType: storeType,
                                      destinationOptions: nil)

    // Copy the `tempMigratedStoreURL` to the `sourceStoreURL` to
    // complete the migration.
    try NSPersistentStoreCoordinator().replacePersistentStore(
        at: storeURL,
        destinationOptions: nil,
        withPersistentStoreFrom: tempMigratedStoreURL,
        sourceOptions: nil,
        ofType: storeType)
}
We mainly use NSMigrationManager.migrateStore() to perform the migration. The most important argument is the mappingModel, which we created using NSMappingModel(from:forSourceModel:destinationModel:). This initialization loads the custom mapping model that we previously created (i.e., MappingV1toV2.xcmappingmodel). The NSMigrationManager will use that mapping model to perform the migration. And in effect, it will delete the Post objects.
The NSMigrationManager does not overwrite the store at storeURL. It will create a new store at the given toDestinationURL argument. In our case, this is just a temporary store URL. So, as a last step, we copy the temporary store to the storeURL location using NSPersistentStoreCoordinator().replacePersistentStore().
After all of that, the store at storeURL will be fully migrated and useable.
The migrate() function can be used like this:
let storeURL = URL(fileURLWithPath: "/path/to/your/CoreDataDatabase.sqlite")
let sourceModel = managedObjectModel(versionName: "App V1")
let destinationModel = managedObjectModel(versionName: "App V2")

try migrate(storeURL: storeURL, from: sourceModel, to: destinationModel)
Last Step: Add Unit Tests
At this point, we have all we need to run the migration and delete the Post objects. I always recommend adding unit tests for Core Data migrations. You can follow my previous post, Writing Unit Tests for Core Data Migrations, for details about how to do that.
The example project also has a unit test that proves that the Post objects get deleted. See MigrationTests.swift.
Caveat
One caveat about using the DeleteObjectsMigrationPolicy is that if there is a non-optional relationship targetting the Post entity, we will have to make sure that we handle that. Or else, there might be validation errors after the migration. We can use DeleteObjectsMigrationPolicy for the related entity to delete them or have other customizations.

